The most epic blueberry pie recipe (and gosh darn if she ain’t a looker too!) Part two: the filling

Okay, did we survive that part okay?  Are we ready for the easy part?  (“Wait, that wasn’t the easy part?” you ask.  I know my friends.  It was easy.  And yet, this part is even easier.  Who would have thought it possible?)  The filling.  Now, I can not take the tiniest bit of credit for this recipe.  My dear friend (who we shall call “Miss P” to protect her identity) made this one day for me and my boyfriend and after having had multiple pieces, we both said “hold the phone!  We MUST have this recipe!”  So she was good enough to pass it on.  I have no idea if she made it up or from whence it came, but we are just happy to have it.  So here we go.

You need 1 pre-baked pie crust.  Since the recipe we just used made two, (and when was two pies ever enough for anyone I ask?) I just doubled the filling recipe below so do the same if that’s how you are going to roll.  And let me just say, do it.  You will be happy you did.  Also, go ahead and brush the crust with a little egg white before you embark on the filling journey.  Ready?  Okay.

-Whisk together in a tiny bowl and set aside:
2 Tablespoons cornstarch
2 tablespoons water

-In another small bowl, mix together and set aside:
1/2 cup sugar
1 teaspoon fresh lemon juice
-Optional, zest half a lemon and add that too.  I did and man oh man, was I happy I did!)
A pinch of salt
A pinch of cinnamon (once again, optional, but why not, I say?

-Other things you will need:
5 cups blueberries
1/2 cup water

Measure out 1 cup of blueberries (use the softest ones, or if you are me, ignore that point and just measure out a flipping cup of blueberries.)
Put them in a medium sized saucepan with 1/2 cup water.  Cover and bring to a boil,  Reduce to low and simmer, stirring constantly, until berries begin to burst (I hate that word, but there’s just not a better one for us to use at this point) and juices begin to thicken, 3-4 minutes.  Remove from heat.

Gradually add cornstarch mixture to berries, stirring constantly, than add the sugar, lemon, salt and cinnamon mixture.  Return to stove and simmer 1 minute or until mixture becomes translucent and thick.

Now, I have to confess, this is where I panicked.  There was nothing “translucent and thick” happening with my blueberries.  I turned the heat up a little and not much was changing, surely not in the minute that the recipe said.  So I threw in a little more cornstarch and I think that and the combo of the slightly higher heat joined together to make some thickening magic!  Whoo hoo!  Now, back on schedule.

Remove from heat and immediately and gently, fold in the remaining 4 cups of blueberries.  Immediately spoon into pie shell and set aside for two hours at room temperature.

Oh dear lord.  Its so beautiful!

There you have it my friends.  Fresh blueberry pie made from scratch, crust and all.  Now don’t be greedy and save some for your friends.  They will thank you for it.  Mine did.

How can I eat a thing of such beauty?  Oh, alright.  If I must.

The most epic blueberry pie recipe (and gosh darn if she ain’t a looker too!) Part 1: The Crust.

I love pie.  Pie is the perfect dessert, breakfast, snack and sweet option in my book.  I’ll take if over chocolate any day.  The combination of sweet cooked fruits, or perfectly spiced pumpkin or sweet potato, combined with a flakey crust….mmm….but I digress.  I am a very busy lady, and the fact that I found the time to make this pie, not once in a week, but TWICE?  Yes, that speaks to just how flipping easy and how AMAZING TASTY it is.  So here you go followers.  Here it is with my little tweaks.  Let us begin with the pie crust: 


Foolproof Pie Dough
Cooks Illustrated, November 2007

Makes enough for one 9-inch double-crust pie
2 1/2 cups (12 1/2 ounces) unbleached all-purpose flour  (This time I am subbing 1 cup of whole flour, we will see how it goes.)
1 teaspoon table salt
2 tablespoons sugar (for round two, I left this out.  I like my sugar left in the filling and not in the crust, but that’s just me.)
12 tablespoons (1 1/2 sticks) cold unsalted butter, cut into 1/4-inch slices
1/2 cup cold vegetable shortening, cut into small bits
1/4 cup cold vodka
1/4 cup cold water

This is where the recipe and I differ.  I do not have a standing mixer, so I used my pastry cutter (which I love dearly, and I like to get my hands dirty so it’s much more fun in my mind.)  So you can either:
a) process 1 1/2 cups flour, salt, and sugar in food processor until combined, about 2 one-second pulses. Add butter and shortening and process until homogeneous dough just starts to collect in uneven clumps, about 15 seconds (dough will resemble cottage cheese curds and there should be no uncoated flour). Scrape bowl with rubber spatula and redistribute dough evenly around processor blade. Add remaining cup flour and pulse until mixture is evenly distributed around bowl and mass of dough has been broken up, 4 to 6 quick pulses. Empty mixture into medium bowl.

Or b) mix everything in in the same steps listed about, but do it with a pastry blender.  Like so.  Then:

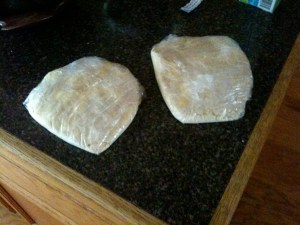
2. Sprinkle vodka and water over mixture. With rubber spatula, use folding motion to mix, pressing down on dough until dough is slightly tacky and sticks together. Divide dough into two even balls and flatten each into 4-inch disk. Wrap each in plastic wrap and refrigerate at least 45 minutes or up to 2 days.

Here is where the fun begins.  When you have waited exactly 45 minutes (I’m not good at doing all this ahead of time, okay?) bring out the dough and roll it out into a roundish shape, big enough to line a pie dish. Preheat your oven to 350 and line the pie crust with parchment, paper, wax paper or aluminum foil.  They say you should fill the crust at least two-thirds full with pie weights, dry beans or rice.  What did I do, you ask?  I’m lazy and I didn’t have any of these items, however I did cover the edges of the pie with foil so it wouldn’t burn, which I hoped would redeem me in the eyes of purists.  Anyways, place pie crusts in the over for 20 minutes.  Remove from oven, cool a few minutes and (if you were a good girl or boy and actually used the pie weights) remove the weights carefully.  Since I did not, the pie had puffed up a bit from the bottom of the dish.  However, not to be deterred I followed the next step which was to poke small holes in the bottom of the crust, remove the foil from the edges and return to the oven for an additional ten minutes.  Then I removed them from the oven and let cool.

So pretty, right?  Yay for the pice crust!  Okay, now round two.  Pie filling.