Baby Groucho turns one

Well the inevitable happened.  My daughter turned one.  ONE!  Everyone tells you it flies by.  People lie about stuff all the time, but this time?  They speak the truth, my friends.  You blink and all of a sudden, instead of being a stationary blob propped up with a Boppy, she is chasing the cat across the room and eating dirt off the floor.  She’s saying words (albeit, maybe only “words” that you and your co parent can understand), pointing, and interacting like a little person.  Crazy times.

Awhile ago I thought that since we weren’t able to throw our annual Christmas bash due to crazy work and going to Alaska for Christmas, we would throw a huge party for Elinor’s first birthday.  Fast forward two months, rehearsals full time, work insanity for both of us adults, and then the norovirus.  Oh yes, because all of that wasn’t enough, but let’s throw a flu into the mix for, oh about a week or so.  Elinor’s birthday was on a Sunday and I planned a kind of last minute brunch with just intimate family.  The Monday before, I got sick.  Elinor got sick Wednesday, and Al, after being a trooper all week long, took one for the team and after taking excellent care of us, finally got it as well.  He rallied by Sunday and after talking to my sister, she graciously offered to pick up hosting duties and we moved the gathering over to her place for a Sunday morning brunch.

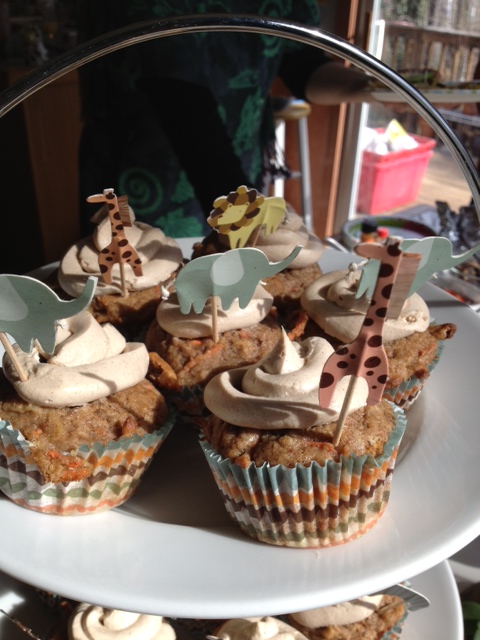
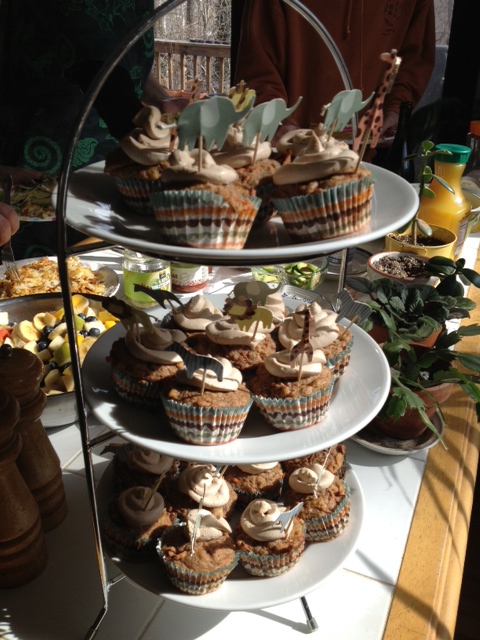
Brunch was awesome.  If my family knows one thing, it’s how to make some darn good food.  Dad brought scrambled tofu, Liz put together an entire breakfast burrito bar, Charlotte made this awesome vegan banana apple cake (I’ll be making it myself in the next few weeks because I could not get enough of it, so recipe forthcoming) and I made a fruit salad, brought hashed browns and made Elinor’s “1st Birthday cake” which I will actually call more like muffin cakes.  I purposely tried to find a recipe with low sugar.  Now I can eat sugar until it’s coming out my ears, don’t get me wrong.  I am not one of those bakers that uses the fake stuff.  Agave, honey, brown sugar, molasses, the regular old white sugar, I’ll use it all.  But Elinor is one, and Al and I believe that why start her on something like that before it’s necessary?  She will have many years before her of sugar highs and lows, candy hearts, sneaking bubble gum with her friends, and trading her hummus sandwich and carrot sticks for a coke and a reeses cup.  So why encourage that before you have to?  But at the same time, I’m also feeding a (small) group.  And I want it to taste good.  So what’s a girl to do?

Off to trolling the internet.  And I found a perfect recipe on a website called “Happy, Healthy Mama.”  Well, that sounded right up my alley. Here is is.  Enjoy these “muffincakes” for breakfast, dessert, snack, whatever! They are healthy enough that you don’t need to feel guilty about eating three of them.  I may have.

Carrot Cupcakes with Maple Cream Cheese Frosting

What you will need:

For the cupcakes:

1 1/2 cups white whole wheat flour (I used half white spelt, half whole spelt.  Again worked great. Love me some spelt.)

1 1/2 teaspoons baking powder

1/2 teaspoon baking soda

1 1/2 teaspoon cinnamon

1/2 teaspoon ground ginger

1/2 teaspoon ground nutmeg

3/4 teaspoon salt

2 eggs

2/3 cup unsweetened applesauce

1/3 cup maple syrup

2 teaspoons vanilla

1/4 cup crushed and drained pineapple

2 cups shredded carrots

For the frosting:

8 ounces cream cheese at room temperature (I used neufchatel, and again, worked great)

4 Tablespoons maple syrup

1 teaspoon vanilla

1 teaspoon cinnamon

Method:

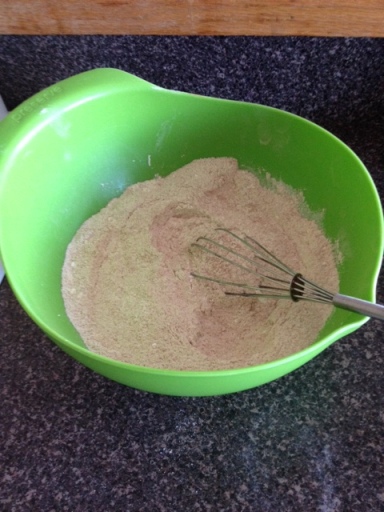
Preheat the oven to 350.  Line muffin tins with paper liners and spray with non-stick cooking spray (or rub lightly with oil or whatever. I only have non-stick olive oil spray and I used it and it was fine.)In a medium bowl, whisk together flour, baking powder and baking soda and spices.  Set aside.
1In a separate bowl, whisk together the eggs, applesauce, maple syrup and vanilla.  Stir in the pineapple and carrots.
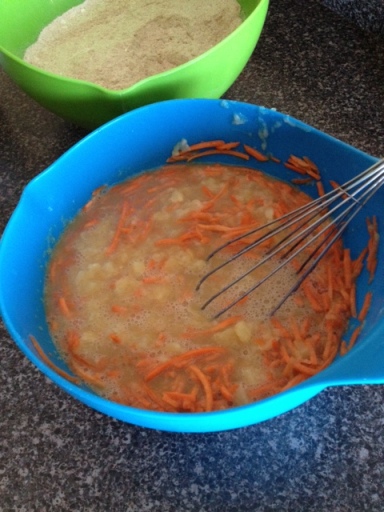
2
Combine the wet and dry ingredients and stir until the mixture is smooth. Spoon around 1/3 of a cup of batter into each muffin liner.  Bake for 22-25 minutes or until a toothpick comes out clean. Allow to cool on a rack before frosting.
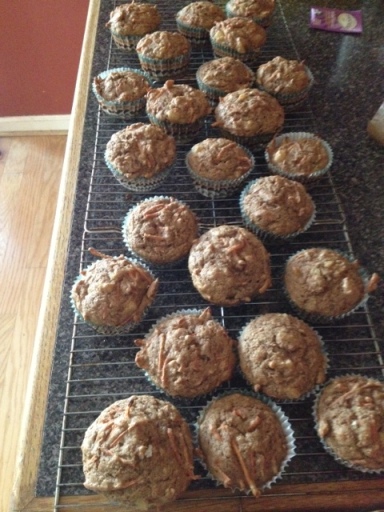
3While cupcakes are cooling, make the frosting. In a medium bowl, beat together cream cheese, maple syrup, vanilla and cinnamon until smooth and whipped.  Ice and eat.  Recipe makes 12 cupcakes (if you wanted to make a full on cake, you would want to double it.)

45

This is how well they went over; I discovered my nephew hiding in the kitchen licking the icing bowl and this is the effect they had on Elinor.

Before:

6

During:

8After:

7I’d say that’s a successful birthday party by anyone’s standards.
How modern electronics and a few cups of coffee, make my days off so productive.

I had a day off.  Two of them, in fact.  With no plans, nothing set in stone, aside from the fact that I should probably work out at some point on one of those days, since I am running in my first ever race in 3 weeks, it’s 10 miles and I’ve never run more than 7.  But who’s counting?  As one of my dear friends said, “I run because I love to eat” and those are my exercise beliefs in a nutshell.

So I had some time off, and lots of things I wanted to make.  We had finally ran low on the copious amount of granola from the prior post (which keeps really well for the record), and with the sweet knowledge that  two days off in a row from my job, comes with the dread that sometime in the not so far off future, I will have to work many days in a row before having 1 day off (see today, day 1 of 9) I wanted some good healthy snack options for me and the Monkey to eat in the week ahead.  So I made my list.

-Granola (a must)
-Hummus
-Bread

But wait.  As I was getting my thoughts and ingredients together, I had a horrible realization.

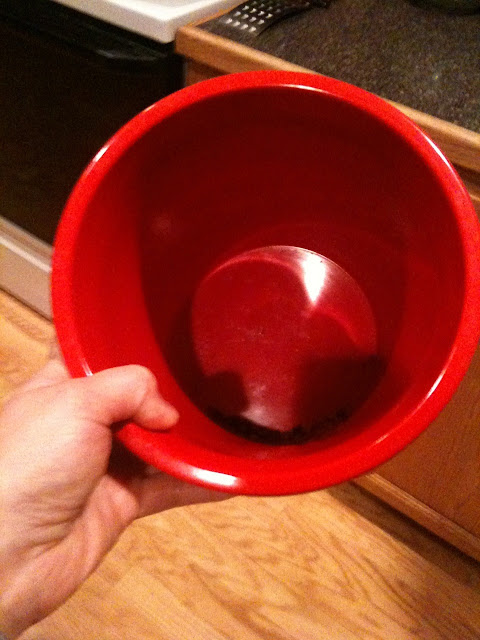
This is my cookie jar.  And something is very, very wrong.

THERE ARE NO COOKIES!  Oh, no, no, no!  This will not do.  A house is not a home without homemade cookies!  Isn’t that a song?  Okay, so let’s write a new list.

-Granola: (it’s so easy, we can totally bust this out in no time.  See prior post.  So.  Easy.)


-Hummus: Okay, I’ve never written about this before, but if you own a food processor, could not BE any easier.


-Bread:  I will address my love for my new kitchen toy, my awesome bread machine, in a later post.  One when I’m feeling really lazy.  There is no skill, but I still love it.

-Cookies: Clearly the front runner.  So this is how it’s going to work.

I had two cups of coffee while I worked.  I hadn’t been on a cooking frenzy like this since we had our annual family making, pie and thanksgiving dessert extravaganza, which included my sister, my niece, and a LOT of red wine.  I started the bread machine first.  I have been trying to make my own sourdough starter for a few weeks, and it’s going okay.  The bread doesn’t quite have the amazing sour taste of a store bought kind, but it’s pretty good in it’s own right, and I’m hoping that the flavor will get stronger over time.  So I put together two recipes, one of a basic sourdough bread machine recipe, and another (which I had made before to excellent results) rosemary bread machine recipe.  Half white, half wheat flour.  It turned out really nicely, and I will continue to tinker with recipes and report back.

Next, once I hit that power button on the bread machine (that’s really all it takes, folks.  If you can just remember to put yeast in last, you are set), I moved on to the granola.  Oven at 325, same for most cookies.  Perfect!  The granola is just as yummy as last time, but I forgot to buy coconut.  Bummer.

Moving on, granola is in the oven, I move on to hummus.  My favorite flavor that I have made is sun-dried tomato.  Take some tahini, garbanzo beans (or chickpeas, depending on what you call them.  Same thing), garlic (I like LOTS), lemon juice, olive oil (depending on how rich you like your hummus, just add more or less) and a little water.  Throw everything in the food processor, and blend. Add more olive oil/water or less depending on how thick you like it.  Then add anything else fun.  Parsley, roasted red peppers, or if you are me, sun-dried tomatoes.  So good.  And then it’s done.

Finally!  The most important.  More important than the breakfast that is granola, the lunch of hummus, the dinner that could be rosemary bread.  Dessert.  Cookies.  I ask the Monkey what kind of cookie he wants.  The winner by a long shot, over oatmeal raisin (he’s not a big fan) or peanut-butter is Molasses.  I doubled the recipe to freeze half the dough (because if you haven’t guessed by now a) I’m lazy and b) I love entertaining and there is nothing I love more than baking fresh cookies for a gathering.  Even when they aren’t fresh.  And they have been living in my freezer keeping the fake meat products and the frozen bananas for smoothies, company.  I also added chocolate chips to half of the dough, because who doesn’t love a little bit of chocolate mixed in with just about anything?  The only thing I would do differently in the future is a little less sugar, as they were a bit sweet to my taste.  Also, instead of sprinkling/rolling them with sugar, I sprinkled them in a pinch of kosher salt.  The secret I learned recently, of a good cookie (specifically chocolate chip, but really this is pretty universal with any cookie) is add just a tiny bit of extra salt.

Thank you Gourmet, by way of Epicourous.  Enjoy these.  We are.  And the fake meat and the frozen bananas in the freezer seem to be pretty fond of them too.

Makes about 25 cookies.

  • 4 cups all-purpose flour
  • 1/2 teaspoon salt
  • 2 1/4 teaspoons baking soda
  • 2 teaspoons ground ginger
  • 1 1/4 teaspoons ground cloves
  • 1 1/4 teaspoons cinnamon
  • 1 stick (1/2 cup) unsalted butter, softened
  • 1/2 cup vegetable shortening
  • 3 1/2 cups sugar
  • 1/2 cup unsulfured molasses
  • 2 large eggs
Preheat oven to 325°F. and lightly grease 2 large baking sheets.
In a large bowl whisk together flour, salt, baking soda, ginger, cloves, and cinnamon.
In another large bowl with an electric mixer beat together butter, shortening, and 3 cups sugar until light and fluffy and beat in molasses. Beat in eggs, 1 at a time, beating well after each addition. Gradually beat in flour mixture and combine well.
In a small shallow bowl put remaining 1/2 cup sugar. Form dough into 2-inch balls and roll in sugar. On baking sheets arrange balls about 4 inches apart and flatten slightly with bottom of a glass dipped in sugar.
Bake cookies in batches in middle of the oven 15 minutes, or until puffed and golden. (Cookies should be soft.) Transfer cookies with a metal spatula to racks to cool.

The most epic blueberry pie recipe (and gosh darn if she ain’t a looker too!) Part two: the filling

Okay, did we survive that part okay?  Are we ready for the easy part?  (“Wait, that wasn’t the easy part?” you ask.  I know my friends.  It was easy.  And yet, this part is even easier.  Who would have thought it possible?)  The filling.  Now, I can not take the tiniest bit of credit for this recipe.  My dear friend (who we shall call “Miss P” to protect her identity) made this one day for me and my boyfriend and after having had multiple pieces, we both said “hold the phone!  We MUST have this recipe!”  So she was good enough to pass it on.  I have no idea if she made it up or from whence it came, but we are just happy to have it.  So here we go.

You need 1 pre-baked pie crust.  Since the recipe we just used made two, (and when was two pies ever enough for anyone I ask?) I just doubled the filling recipe below so do the same if that’s how you are going to roll.  And let me just say, do it.  You will be happy you did.  Also, go ahead and brush the crust with a little egg white before you embark on the filling journey.  Ready?  Okay.

-Whisk together in a tiny bowl and set aside:
2 Tablespoons cornstarch
2 tablespoons water

-In another small bowl, mix together and set aside:
1/2 cup sugar
1 teaspoon fresh lemon juice
-Optional, zest half a lemon and add that too.  I did and man oh man, was I happy I did!)
A pinch of salt
A pinch of cinnamon (once again, optional, but why not, I say?

-Other things you will need:
5 cups blueberries
1/2 cup water

Measure out 1 cup of blueberries (use the softest ones, or if you are me, ignore that point and just measure out a flipping cup of blueberries.)
Put them in a medium sized saucepan with 1/2 cup water.  Cover and bring to a boil,  Reduce to low and simmer, stirring constantly, until berries begin to burst (I hate that word, but there’s just not a better one for us to use at this point) and juices begin to thicken, 3-4 minutes.  Remove from heat.

Gradually add cornstarch mixture to berries, stirring constantly, than add the sugar, lemon, salt and cinnamon mixture.  Return to stove and simmer 1 minute or until mixture becomes translucent and thick.

Now, I have to confess, this is where I panicked.  There was nothing “translucent and thick” happening with my blueberries.  I turned the heat up a little and not much was changing, surely not in the minute that the recipe said.  So I threw in a little more cornstarch and I think that and the combo of the slightly higher heat joined together to make some thickening magic!  Whoo hoo!  Now, back on schedule.

Remove from heat and immediately and gently, fold in the remaining 4 cups of blueberries.  Immediately spoon into pie shell and set aside for two hours at room temperature.

Oh dear lord.  Its so beautiful!

There you have it my friends.  Fresh blueberry pie made from scratch, crust and all.  Now don’t be greedy and save some for your friends.  They will thank you for it.  Mine did.

How can I eat a thing of such beauty?  Oh, alright.  If I must.

The most epic blueberry pie recipe (and gosh darn if she ain’t a looker too!) Part 1: The Crust.

I love pie.  Pie is the perfect dessert, breakfast, snack and sweet option in my book.  I’ll take if over chocolate any day.  The combination of sweet cooked fruits, or perfectly spiced pumpkin or sweet potato, combined with a flakey crust….mmm….but I digress.  I am a very busy lady, and the fact that I found the time to make this pie, not once in a week, but TWICE?  Yes, that speaks to just how flipping easy and how AMAZING TASTY it is.  So here you go followers.  Here it is with my little tweaks.  Let us begin with the pie crust: 


Foolproof Pie Dough
Cooks Illustrated, November 2007

Makes enough for one 9-inch double-crust pie
2 1/2 cups (12 1/2 ounces) unbleached all-purpose flour  (This time I am subbing 1 cup of whole flour, we will see how it goes.)
1 teaspoon table salt
2 tablespoons sugar (for round two, I left this out.  I like my sugar left in the filling and not in the crust, but that’s just me.)
12 tablespoons (1 1/2 sticks) cold unsalted butter, cut into 1/4-inch slices
1/2 cup cold vegetable shortening, cut into small bits
1/4 cup cold vodka
1/4 cup cold water

This is where the recipe and I differ.  I do not have a standing mixer, so I used my pastry cutter (which I love dearly, and I like to get my hands dirty so it’s much more fun in my mind.)  So you can either:
a) process 1 1/2 cups flour, salt, and sugar in food processor until combined, about 2 one-second pulses. Add butter and shortening and process until homogeneous dough just starts to collect in uneven clumps, about 15 seconds (dough will resemble cottage cheese curds and there should be no uncoated flour). Scrape bowl with rubber spatula and redistribute dough evenly around processor blade. Add remaining cup flour and pulse until mixture is evenly distributed around bowl and mass of dough has been broken up, 4 to 6 quick pulses. Empty mixture into medium bowl.

Or b) mix everything in in the same steps listed about, but do it with a pastry blender.  Like so.  Then:

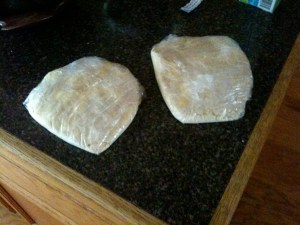
2. Sprinkle vodka and water over mixture. With rubber spatula, use folding motion to mix, pressing down on dough until dough is slightly tacky and sticks together. Divide dough into two even balls and flatten each into 4-inch disk. Wrap each in plastic wrap and refrigerate at least 45 minutes or up to 2 days.

Here is where the fun begins.  When you have waited exactly 45 minutes (I’m not good at doing all this ahead of time, okay?) bring out the dough and roll it out into a roundish shape, big enough to line a pie dish. Preheat your oven to 350 and line the pie crust with parchment, paper, wax paper or aluminum foil.  They say you should fill the crust at least two-thirds full with pie weights, dry beans or rice.  What did I do, you ask?  I’m lazy and I didn’t have any of these items, however I did cover the edges of the pie with foil so it wouldn’t burn, which I hoped would redeem me in the eyes of purists.  Anyways, place pie crusts in the over for 20 minutes.  Remove from oven, cool a few minutes and (if you were a good girl or boy and actually used the pie weights) remove the weights carefully.  Since I did not, the pie had puffed up a bit from the bottom of the dish.  However, not to be deterred I followed the next step which was to poke small holes in the bottom of the crust, remove the foil from the edges and return to the oven for an additional ten minutes.  Then I removed them from the oven and let cool.

So pretty, right?  Yay for the pice crust!  Okay, now round two.  Pie filling.